How to configure an API key
After you install CyOps Desktop, configure an API key before you start chatting or running tasks.
Step 1. Open the API key configuration entry
You can enter the configuration flow in either of the following ways.
Option A. First-time setup prompt
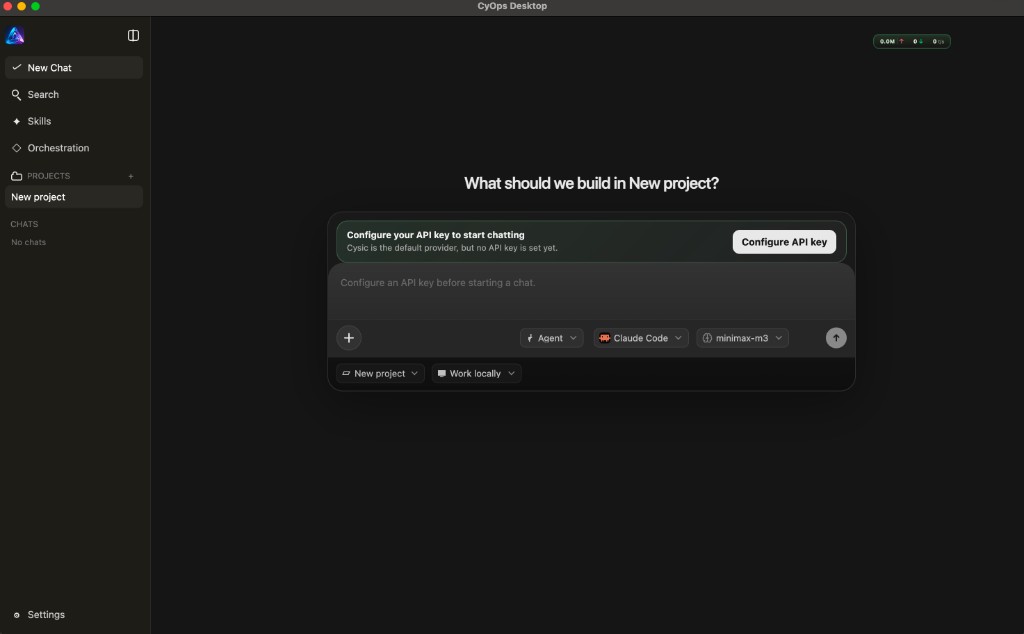
If this is your first install of CyOps Desktop and no API key is configured yet, the home workspace shows a reminder: Configure your API key to start chatting. Click Configure API key to open the Models settings.
Option B. Settings button
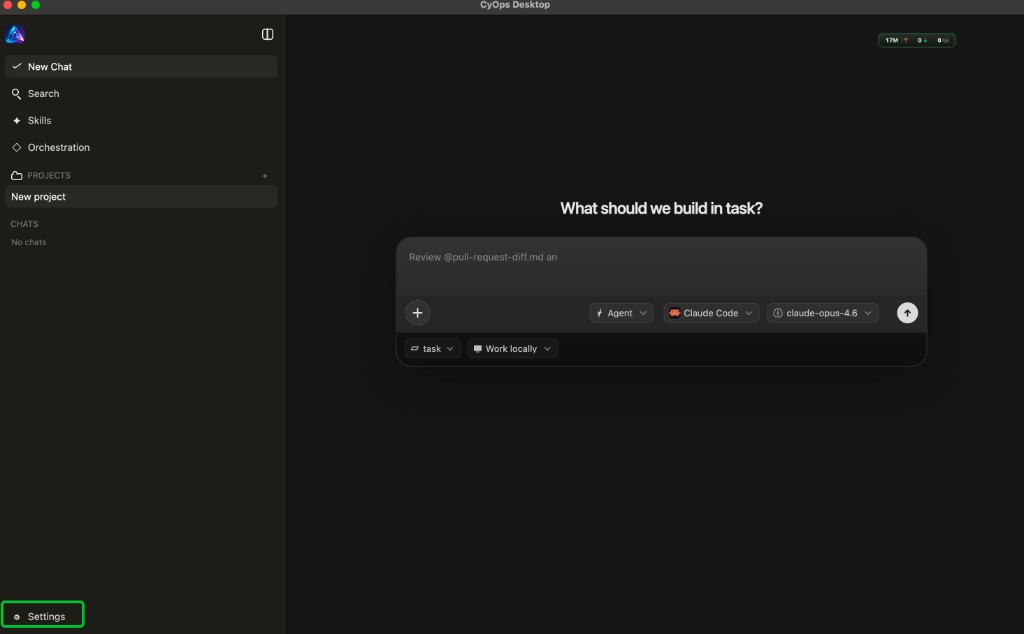
If you already passed the first-launch prompt, or you want to update an existing key later, click Settings at the bottom of the left sidebar, then open Models.
Step 2. Get an API key and paste it into the provider
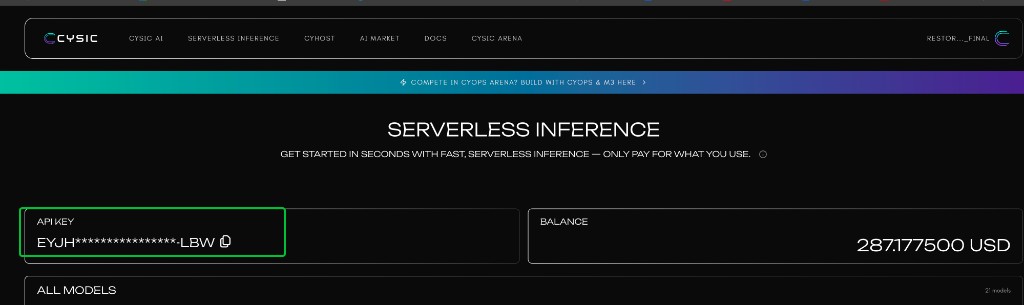
- Open Serverless Inference and sign in.
- In the API KEY card, click the copy icon to copy your key.
- Back in CyOps Desktop Models settings, edit the default Cysic provider (or open the editor from the first-time prompt), paste the key into API key, and keep the Cysic Base URL if you are using Cysic inference.
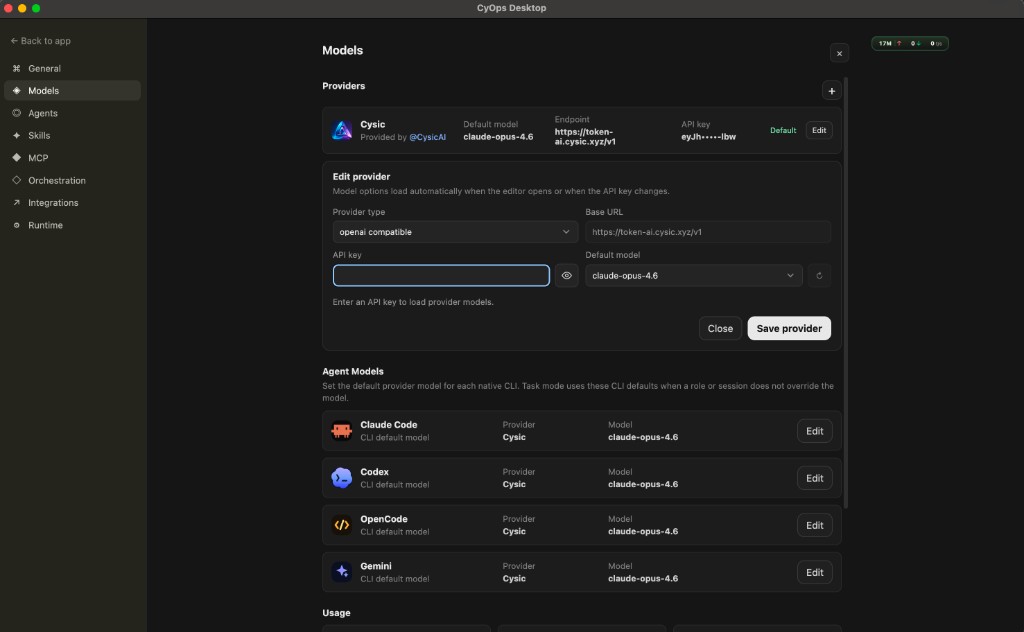
You can also use another OpenAI-compatible or Anthropic-compatible API provider. In that case, click the + button in the Providers section to create a custom provider, then fill in that provider's API endpoint and API key.
Step 3. Save and start using CyOps Desktop
Click Save provider. When the key is accepted, CyOps Desktop shows a confirmation such as Cysic API key saved. Chat is ready. You can then return to the app and start chatting or running tasks.
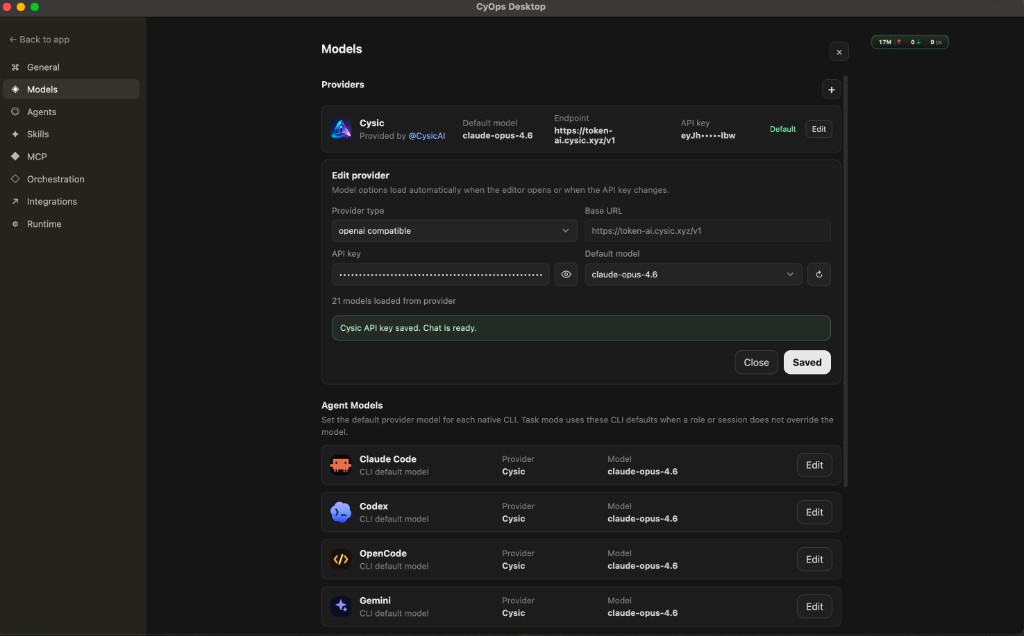
The provider's Default model is used as the main CyOps Desktop inference model, and as the default model for agent and strategy roles, unless you explicitly set a different model for those roles or for a specific session.